I remember my experience photographing landscapes on New Zealand's South Island last month. I woke up at 4 AM, drove for over an hour in the cold wind to reach Lake Tekapo. Though shivering in the cold air, I was filled with anticipation for the beautiful scene to come. When the first ray of sunlight hit the lake, the water, snow-capped mountains, and church blended perfectly together - the breathtaking moment made me forget all my fatigue.
I recall my fingers were nearly frozen, but I persisted in adjusting the tripod position to find the perfect angle. The effort paid off - the final photo exceeded my expectations. The lake surface sparkled, distant snow-capped mountains were bathed in golden sunlight, and the Church of the Good Shepherd reflected in the lake created a perfect composition. After posting this photo on social media, many friends asked how I achieved this effect.
There's actually quite a story behind capturing this photo. The night before, I had checked sunrise time and weather conditions using my phone app, and studied the best shooting location on Google Maps. To arrive at the spot before sunrise, I stayed at a hotel in Tekapo town the day before. Today I'd like to share with you about travel photography and discuss the experience and insights I've accumulated over these years.
Did you know that travel photography and landscape photography are two different concepts? Many people think travel photography is simply taking a camera on trips, but this understanding is too simplistic. Travel photography is more like storytelling - it needs to capture not just beautiful scenery but also local culture, humanities, and daily life.
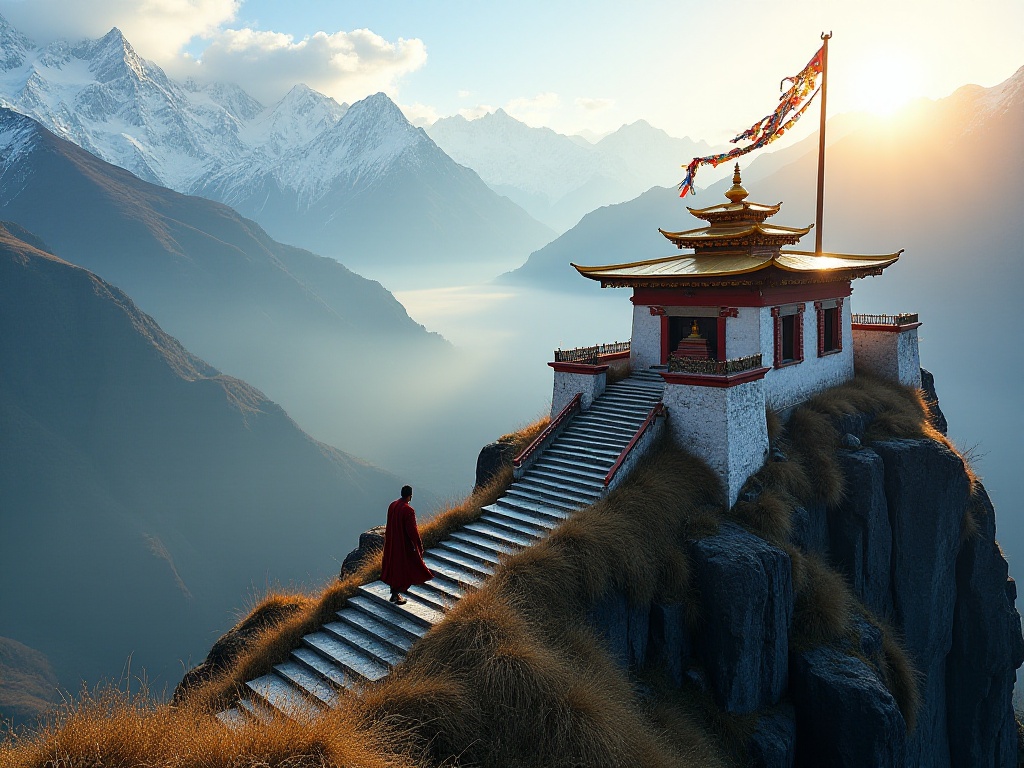
Take my experience photographing the Potala Palace in Tibet for example. I stayed in Lhasa for a whole week, visiting the Potala Palace square every morning. Beyond just photographing the building itself, I included elderly people exercising, lamas chanting, and pilgrims worshipping in my shots. In the early morning, local elderly people would dance in the square, lamas hurried past in dark red robes, and devout believers performed full-body prostrations. These scenes represent the real life of Lhasa.
I remember one morning meeting an elderly Tibetan grandmother who circumambulated the Potala Palace daily. I greeted her in my broken Tibetan, and she responded with a kind smile. At that moment, I pressed the shutter, capturing not just the majestic Potala Palace but also every wrinkle on her face and her well-worn prayer wheel. This photo was later selected as a finalist in an international photography competition, with the judges commenting: "It shows Tibet's cultural depth through an ordinary person's daily life."
Landscape photography, on the other hand, focuses more on presenting natural scenery itself. For instance, when I photographed Half Dome in Yosemite National Park, I mainly focused on the rock texture, light and shadow changes, and cloud movements - all natural elements. Both types of photography are fascinating but require different shooting approaches and techniques.
In my view, excellent travel photography should allow viewers to feel the local atmosphere. Like my photos of the morning ritual at the Ganges in Varanasi, India, which not only showed the grand ceremonial scene but also captured the devotees' sincere expressions, the priests' solemn movements, and even seemed to convey the incense-filled air through the photographs.
I remember when I first started learning travel photography, I would just shoot randomly. Shooting whatever I saw, without considering composition or lighting. Looking back at those photos now makes me both laugh and cry. After years of exploration, I've summarized some practical techniques.
First is composition, which is both the most basic and most important aspect. Many people might think composition is mysterious, but it's actually about how to arrange various elements within a limited frame. When shooting, you need to find the main subject - it could be a building, a person, or a landscape. Then arrange other elements around this subject.
For example, when photographing hot air balloons in Cappadocia, Turkey, I used the golden light at sunrise to create silhouettes of distant balloons, while using nearby rocks to frame the entire scene. To get this set of photos, I scouted the location a day in advance and found a hill with an open view. The next day, I got up at 3 AM and climbed to the hilltop in the cold wind. The waiting process was tough, but when the first ray of sunlight pierced through the clouds and illuminated dozens of hot air balloons in the sky, all the effort was worth it.
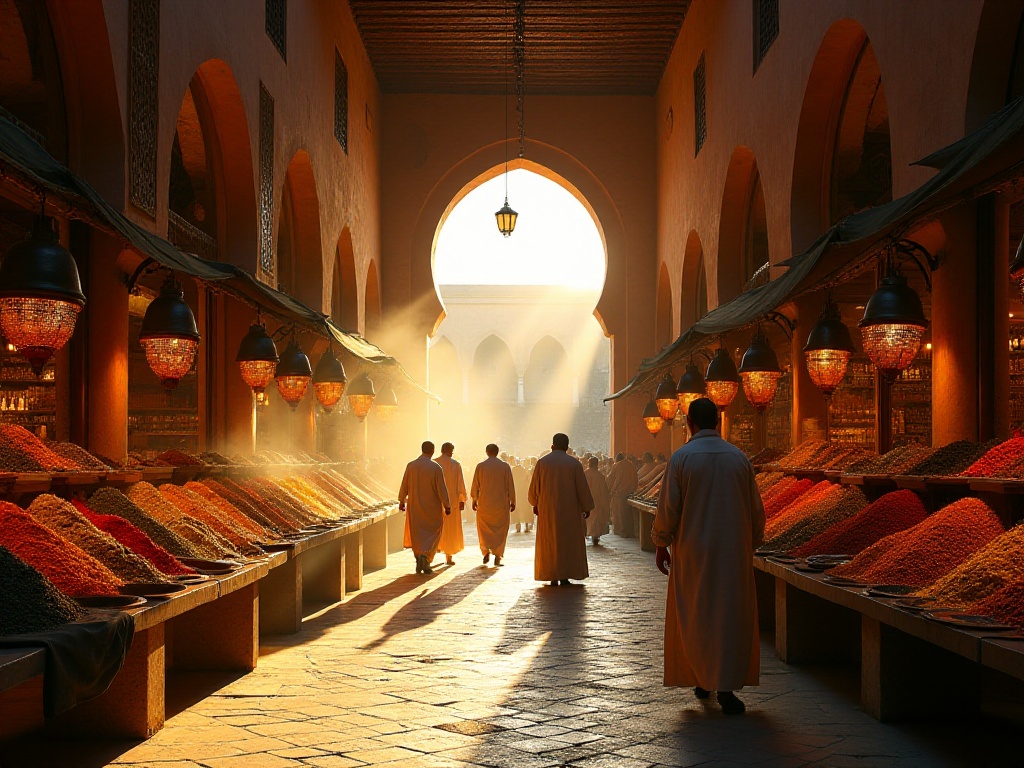
There are many composition techniques, such as the rule of thirds, symmetrical composition, leading lines, etc., but the most important thing is to have your own ideas. I often flexibly apply these techniques based on the situation. When photographing gondolas in Venice, I often use reflections to create symmetrical images. When shooting in the medina of Morocco, I use winding streets as leading lines to guide viewers' eyes to distant mosque minarets.
The use of light is also crucial. Different lighting can give the same scene completely different effects. Generally, morning and evening light is best for photography, what photographers call the "golden hour." During these times, the sun's angle is lower, the light is softer, creating a dreamy atmosphere.
But this doesn't mean you can't shoot at other times. For example, at noon, strong light creates obvious contrast, particularly suitable for capturing the geometry of architecture. When I photographed the Burj Khalifa in Dubai, I deliberately chose noon time, using strong light and shadow to emphasize the building's three-dimensionality.
Weather is also an important factor. Cloudy days, rainy days, foggy days - each weather condition brings unique shooting opportunities. When photographing Tower Bridge in London, I encountered rare foggy weather. While many people thought this weather wasn't suitable for photography, I felt it was perfect for creating mystery. In the final photos, Tower Bridge appeared to float in the mist like something from a fairy tale.
Photographing people is also a crucial part of travel photography. When photographing strangers, the most important thing is to respect them. I usually express my intention to take photos with a smile and simple body language, only raising my camera after getting their consent. When photographing street vendors in India, I often buy some of their goods first, chat a bit, and start shooting only after they're relaxed. Photos taken this way appear more natural and lively.
Many people often ask me: "How expensive does a camera need to be to take good photos?" Honestly, this question misses the point. Today's phone cameras are already very powerful - the key is knowing how to use them. I've seen many people with equipment worth tens of thousands taking photos that aren't as good as casual phone shots.
Actually, equipment selection should be based on your needs and budget. If you're a beginner enthusiast, an entry-level mirrorless camera is completely sufficient. My first camera was an entry-level Sony A6000, which I used for two years and learned many basic concepts with.
Of course, if you become more serious about photography and want to pursue better image quality, investing in a full-frame camera is also a good choice. But remember, the camera is just a tool - the most important thing is mastering the techniques to use it.
Lens selection is also important. I usually carry three lenses: a wide-angle lens for landscapes and architecture, a standard zoom lens for most scenes, and a telephoto lens for distant details. But be careful not to bring too many lenses - it not only increases luggage weight but more importantly affects your focus on shooting itself.
Besides cameras and lenses, a tripod is also important equipment. Especially when shooting sunrises, sunsets, starry skies, and other low-light environments, a tripod helps you get clearer images. But choose one that's both sturdy and lightweight, since you'll be carrying it around.
Speaking of phone photography, today's flagship phones have very powerful photography capabilities. For example, multiple cameras can handle different shooting scenarios, and night mode can take clear photos in low light conditions. Plus, phones' biggest advantage is that they're always with you, able to capture fleeting moments.
When camping in Morocco's Sahara Desert, I captured the most spectacular starry sky with my phone. That night, we sat by the campfire outside our tents, with the brilliant Milky Way overhead. The phone's night mode perfectly recorded this unforgettable moment. So equipment isn't the most important thing - what matters is your aesthetic sense and creative consciousness.
Post-processing is really important, but must be done in moderation. My principle is: make photos more truly reflect how it felt at the time, rather than creating a scene that didn't exist.
In post-processing, I mainly adjust the following aspects:
First is exposure and contrast. Sometimes the camera's recorded image might be darker or brighter than what we actually saw, so appropriate exposure adjustment is needed. Contrast adjustment can add more depth to the image.
Then there's color temperature and tone. Different light sources can cause different color temperatures in photos - for example, photos taken on cloudy days might appear cool, so warm tones need to be appropriately increased. But it must be controlled moderately, not overdone.
For example, with sunset photos I took in the Maldives, I would only appropriately increase warm tones to restore the feeling at the time, rather than making the sky purple. Because that sunset was indeed very warm, with golden sunlight scattered on the sea surface, the whole scene was filled with warm atmosphere.
Sharpening and noise reduction are also important post-processing steps. Especially for photos taken at high ISO, there might be more noise, requiring appropriate noise reduction. But be careful not to over-reduce noise, or details will be lost.
I usually use Lightroom and Photoshop for post-processing. Lightroom is suitable for overall adjustments like exposure, contrast, color temperature, etc. Photoshop is better for local fine adjustments, like removing unwanted elements from the image.
During post-processing, I have a small habit of stopping periodically to step back and look at the overall effect. This helps avoid getting lost in details while neglecting the overall feel. Also, I save some key steps from my editing process to create my own presets, which can improve post-processing efficiency.
Last year while photographing cherry blossoms in Kyoto, Japan, I encountered an interesting situation. Arriving at the Philosopher's Path at 5 AM, I found it already crowded with photographers. Instead of squeezing in with them to photograph the cherry blossoms, I turned around and captured them focused on shooting, with falling cherry blossoms in the frame, creating a photo with more narrative.
This experience taught me that sometimes changing perspective can reveal different kinds of beauty. I remember the scene clearly - dawn was just breaking, the air filled with cherry blossom fragrance. Dozens of photographers stood with their tripods, completely focused on waiting for the perfect moment to shoot. Standing behind them, I used a 70-200mm telephoto lens, using compression effect to create an interesting contrast between the falling cherry blossom petals and the focused photographers.
This photo was later selected by a photography magazine, with the editor saying it not only showed Kyoto's beautiful cherry blossoms but also people's pursuit of beauty. This made me deeply realize that travel photography isn't just about recording beautiful scenes, but more importantly having your own observations and thoughts.
Another memorable case was my experience photographing in Hoi An Ancient Town, Vietnam. Hoi An is famous for its yellow ancient buildings and red lanterns, but I noticed most tourists were shooting on the main street. So I decided to walk into the alleys, where there were more authentic life scenes.
One morning, I met an old craftsman making lanterns. His workshop was in a narrow alley, with sunlight streaming through gaps in the roof, creating a natural spotlight effect. I used a 35mm prime lens at f/1.4 to capture him working intently. Though we couldn't communicate through language, we established simple communication through gestures and smiles. The final set of photos not only showed the charm of traditional craftsmanship but also recorded the everyday life of Hoi An Ancient Town.
For those wanting to improve their travel photography, I suggest trying these methods:
Study light changes. For example, the same spot photographed at different times will have completely different effects. At India's Taj Mahal, I stayed for an entire day, shooting from sunrise to sunset, with different light effects at each period. In early morning, the Taj Mahal was shrouded in mist, appearing mysterious and hazy; at noon, strong sunlight made the white marble particularly brilliant; at sunset, the entire building was dyed golden, especially when the last ray of sunlight passed through the arch - that shocking feeling is indescribable.
Understand local culture. Before photographing pagodas in Bagan, Myanmar, I would first learn about these buildings' historical and cultural background, allowing me to create more meaningful work. For instance, knowing that pagodas from different dynasties have different architectural features helped me deliberately highlight these characteristics when shooting. Moreover, understanding local culture helps us better communicate with local people and get more shooting opportunities.
Maintain an open and curious mindset. Travel often brings unexpected situations, which might lead to unexpected shooting opportunities. I remember once in Istanbul, Turkey, when rain prevented my planned shooting, I walked into a Turkish bath. After getting permission, I photographed the interior of this century-old establishment - the domed ceiling amid steam, old marble countertops, all exuding unique charm.
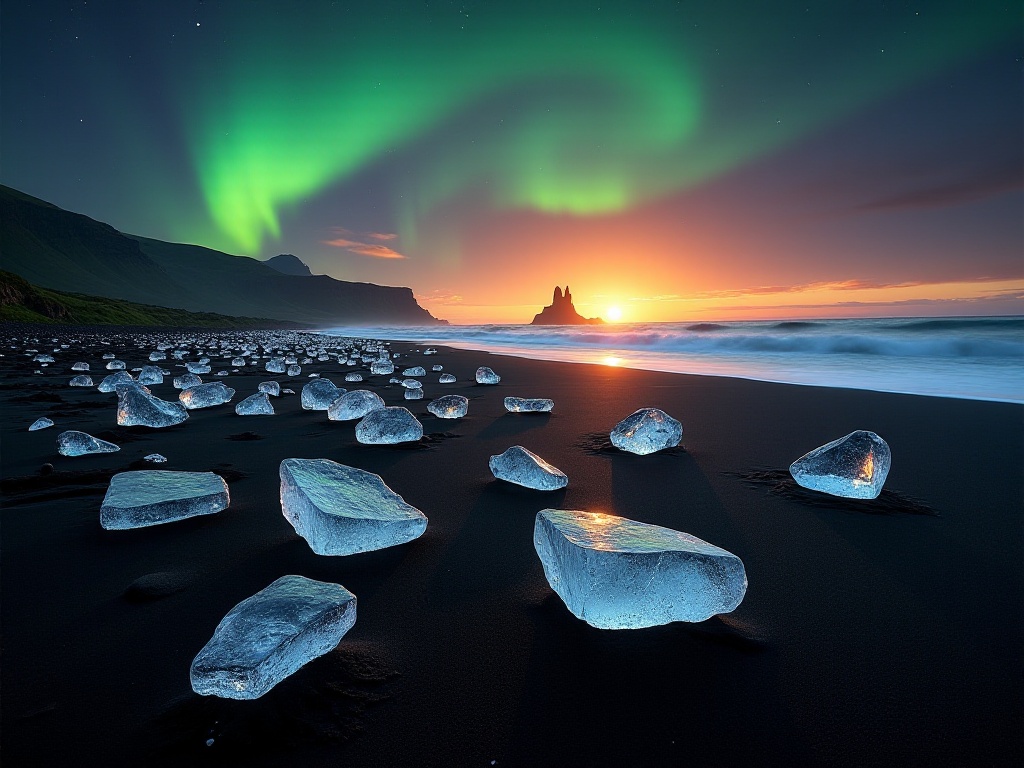
Learn to wait. Good photos often require patient waiting. When shooting sunsets in Santorini, I usually arrive at the shooting location two hours early, waiting for the best light. When photographing aurora in Iceland, you might need to wait several hours in temperatures below minus ten degrees. But when the beautiful scene appears, all the waiting is worth it.
Develop your own shooting style. This requires time and experience to accumulate, but you can start by imitating. Study the work of photographers you like, analyze their composition methods and lighting techniques, then gradually develop your own style through practice. For example, I particularly like adding human elements to photos to make scenes more lively.
Do your homework before shooting. Before departing, research the destination's weather conditions, best shooting times and locations. I use some photography apps to check sunrise and sunset times, use Google Maps to study shooting angles, and even look at other photographers' work on social media for inspiration.
Travel photography isn't just about pressing the shutter - it's a process that requires feeling with your heart and discovering with your eyes. Each journey is a learning opportunity, not only improving photography skills but also broadening horizons and understanding different cultures.
I remember meeting a group of happy children in a small village in Nepal. Though their life was simple, they always wore sincere smiles. Through my lens, I captured their pure smiling faces, which also made me rethink what true happiness is.
This is the charm of travel photography - it not only allows us to record beautiful scenery but also helps us record touching moments and contemplate the truth of life. I hope through sharing this article, I can help you take better photos on your next journey.
Everyone has their unique perspective - I look forward to seeing your wonderful work. Do you have any unique travel photography experiences to share? Welcome to tell me in the comments.
 Previous